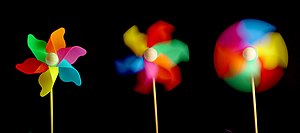
Yesterday, after the rain, while the sun hasn't set, we went over to the new flat to see how the renovation is progressing.
The floor tiles have already been laid down and done, as well as the master bedroom toilet tiles. And that is after the removal of the old bathtub was removed, which necessitated the removal of the remaining floor tiles and wall tiles, which required hacking. But that is all done now.
While in the rented flat, I've been able to use only my Samsung Omnia II phone to take pictures of the views presented to me now and then. And so, while not quite dramatic, the essence is still there. I have a picture of the sunrise, and a picture of the sunset. Some that I've taken are blur, but I managed to get quite clear takes.
I have also the morning sun in red, when the haze from Indonesia blanketed Singapore, the recent haze I mean.
So here they are, and hopefully, while I'm not able to use my dSLR, that doesn't stop me from taking photos.
Wednesday, November 17, 2010
Thursday, October 28, 2010
What has been in my photography journey
Image via WikipediaAlmost a year past, and I ask myself, where am I now in my photography journey?
I've read a ton of books. After finishing about 5, I find that most of the books are discussing simply the same idea 99%. The 1% difference is the individuality of the authors - and this is but the cream of the written word. And for most authors, they are sharing their skills and experience in the hope that you can also become like one of them. Of course I mean to say that you become like one of them in their level of photography. For some other authors, they just go through the yaadah-yaadah part of their photographs, their techniques, etc., etc., but none of their skills that can be acquired by the reader - in time. And photography being such an individualistic art, or should I say, a very subjective display of talent, I would tend to question those who would not want to share their talent to others - for they can never be copied or replaced - they are their own photographer, and you are your own. for even though the techniques are the same, it is your individuality and uniqueness that shows in your photographs. That is all the essence then, and is now, and will be.
I've not been into a park or mountain or cliff, or any grand photograph site for that matter. However, I have not limited my photography to the use of my DSLR. I also use my cell phone whenever opportunity is presented. Like the recent haze here in Singapore, where the sun was in orange. What can I say, as advocated by more than 1 author, a photographer has to come out of being a simple phot-taker, snapping the ordinary, photographing the obvious. To set your own mark, you would have to have an eye on the extra-ordinary, or the un-obvious, or the unfamiliar view. And this is done whether or not you are caryying your camera with you.
Keeping my photos, though they are nice or not. One book suggests immeidately deleting your bad photos. The reason presented is to be able to save some space in your SD card or harddisk. Secondly is to not "confuse" your good photos with the bad photos. Thirdly is that when you "showcase" your photos, the list is already edited and the bad ones removed. For some time I followed this advise. Then I thought to myself, why should I? You see, I am one who would like to 'keep' my 'unfortunate' snaps - of course, as a leaning tool. Seeing the shoots that didn't make the mark helps me to focus on my learning - not repeating the same mistake the next time I push the button. Of course, this doesn't happen overnight, but what better way for you to find out how far you've been progressing if you don't have a 'show of it'?
I have subscribed to a digest or a forum. Basically, I signed up to Digital Photography School by Darren Rowse, and I like being in the list. Quite a lot to be learned from fellow photographers, to mention the least. there there are tips and tricks from experienced, or should I say, professional, photographers? Get in the list yourself.
Another group that I signed up to is Digital SLR Guide Newsletter by Chris Roberts. It isn't quite verbose compared to Digital Photography School, but there's a grain of wisdom that can be gleaned from it just the same.
And finally, whatever level of photography you are in, there is always the chance to be yourself in your photographs - something that shouldn't be daunted by the other photographs that you see. keep on snapping and learning, and learning and snapping. Your time will come. And your photos will be on the great wall for others to admire.
Now isn't that something to make you keep on with your photography journey?
Related articles
- The Principles of Design in Digital Photography (brighthub.com)
- The Best White House Photos, by the Best White House Photographer [Photography] (gawker.com)
- Groundbreaking photography: Hereford Photography Festival (independent.co.uk)
- Halloween Photography Tips (digital-photography-school.com)
- Photographer Joanna Madloch of Short Hills, NJ, has Won Second Place for September in the Prestigious Photography Contest Sponsored by BetterPhoto.com (prweb.com)
- Strobox Pairs Photographs and their Lighting Schemes [Photography] (lifehacker.com)
- Outdoor Portrait Photography Poses (brighthub.com)
Sunday, October 10, 2010
A transitionary place
We sold our flat in Sembawang, and we bought a flat in Woodlands. We have to move out, as the new owners are coming in, but we can’t move in to the new flat yet because the owners of the other flat have not yet moved out, and they actually requested for a 3-week extended stay.
We rented a flat with some others, who are the real tenants.
Anyway, I managed to get a shot of the sunset there with some of the place’s buildings, and this one is clear while the other 2 are not.
So, here it is!
By the way, we are in Woodlands Drive 50 for the next 2 months… at most.
We rented a flat with some others, who are the real tenants.
Anyway, I managed to get a shot of the sunset there with some of the place’s buildings, and this one is clear while the other 2 are not.
So, here it is!
By the way, we are in Woodlands Drive 50 for the next 2 months… at most.
Thursday, June 24, 2010
Is it a Digital Camera or a Digital SLR Camera?
Image via Wikipedia
It could be something obvious, but if you didn't know, you would miss it.I haven't covered this in my posts, and while I wanted to, I'd just link to this post which already expounded on the difference between a Digital Camera (a.k.a. Point-and-Shoot camera) and a Digital SLR Camera.
No to delay further, here it is:
What Is The Difference Between A Digital Camera And A Digital Slr Camera?
Related articles by Zemanta
- Nikon D700 Digital SLR Camera Review (brighthub.com)
- iPhone 4 Camera Test (chris.pirillo.com)
- Finding the Best 10 MP Digital SLR Camera (brighthub.com)
- Help me shake the digital SLR camera body blues (ask.metafilter.com)
- Cheap Senor Swab Materials For Digital SLR Cameras (ask.metafilter.com)
- Cameras On Sale at Amazon (littlegreenfootballs.com)
- Finding the Best Shot (online.wsj.com)
- Digital camera to use while kayaking? (ask.metafilter.com)
- Phase One: All the camera $55K can buy (news.cnet.com)
- Sony releases two new DSLR cameras (macworld.com)
Friday, June 4, 2010
Book review: MASTER LIGHTING GUIDE for Commercial Photographers
I managed to read the book before I returned it to the library, and true enough, as it was mentioned in the preface section, there were a lot of easy-to-understand figures and diagrams on lighting.
What is actually good about this book is that the diagram is presented, and the resulting photograph is also included. gives you both an insight on how to position your light, what direction, what height, how strong (or soft), etc., etc., and it also comes with the picture that will be taken using that particular lighting structure.
Also tells of the different lighting types, and its accessories.
Not much I will say, so that I will leave the rest for the book to tell about itself.
MASTER LIGHTING GUIDE for Commercial Photographers
by Robert Morrissey
Related articles by Zemanta
- Photographer Giacomo Brunelli's best shot (guardian.co.uk)
- The light you see (christopherspenn.com)
- Guides to Revamp the Abode by Using Innovative Light Systems (wealthyways4you.com)
- Thematic Photographic 100 - Into the Clouds (writteninc.blogspot.com)
- Advice for Photographers Using Creative Commons Licenses (copyrightlitigation.blogspot.com)
- Capturing Light (cehwiedel.com)
- Brad Trent on the Fake Reality of Portraits (strobist.blogspot.com)
- Smart Lighting Workshop, May 27, 2010 (slideshare.net)
- Brad Balfour: Exclusive: Photog Friedler Gets Stripped Naked In Las Vegas (huffingtonpost.com)
- Mastering Canon EOS Flash Photography (oreilly.com)
Tuesday, May 11, 2010
Which ISO value do I use?
Knowing is half the battle, and practicing is the perfection of the skill. With this, read on...
-----
Which ISO Setting Should I Use?
By Dr. Mark Clayson
What ISO setting should you use for everyday photography?
There is no simple answer, but have a look at the following responses to decide what is best for you:
"I usually use ISO 100, but if I realise I can't hold the camera still I increase the ISO or use a tripod"
"I most usually shoot at ISO 100, 200 and occasionally ISO 400. It annoys me that there is slight noise when I zoom on the PC. In reality you won't see it"
"I start at 100, and work up until I get a reasonable shutter speed that I feel I can cope with"
"I set the camera at 200 in good weather and 400 in bad"
"In bad light I don't go below 400"
"Inside, I start at 400, then go to 800 or more when needed. Outside I start at 100"
"If I tend to get camera shake I increase the ISO till everything is OK"
"In fully automatic mode my camera does this itself"
"I find I use 100 rarely. I prefer to go for a higher ISO to get faster shutter speeds"
So, you can see that the ISO setting is dependent upon the conditions and upon personal preferences. Experiment to find the settings that work best for you.
Eric Hartwell runs the photography resource site http://www.theshutter.co.uk and the associated discussion forums as well as the regular weblog at http://thephotographysite.blogspot.com
Article Directory: EzineArticles
From Ezine article directory with the same title:
Which ISO Setting Should I Use?
-----
-----
Which ISO Setting Should I Use?
By Dr. Mark Clayson
What ISO setting should you use for everyday photography?
There is no simple answer, but have a look at the following responses to decide what is best for you:
"I usually use ISO 100, but if I realise I can't hold the camera still I increase the ISO or use a tripod"
"I most usually shoot at ISO 100, 200 and occasionally ISO 400. It annoys me that there is slight noise when I zoom on the PC. In reality you won't see it"
"I start at 100, and work up until I get a reasonable shutter speed that I feel I can cope with"
"I set the camera at 200 in good weather and 400 in bad"
"In bad light I don't go below 400"
"Inside, I start at 400, then go to 800 or more when needed. Outside I start at 100"
"If I tend to get camera shake I increase the ISO till everything is OK"
"In fully automatic mode my camera does this itself"
"I find I use 100 rarely. I prefer to go for a higher ISO to get faster shutter speeds"
So, you can see that the ISO setting is dependent upon the conditions and upon personal preferences. Experiment to find the settings that work best for you.
Eric Hartwell runs the photography resource site http://www.theshutter.co.uk and the associated discussion forums as well as the regular weblog at http://thephotographysite.blogspot.com
Article Directory: EzineArticles
From Ezine article directory with the same title:
Which ISO Setting Should I Use?
-----
Related articles by Zemanta
- Red Tailed Hawk - A Lesson in Widlife Photography (nofluffjuststuff.com)
- Jason #2 (chromasia.com)
- Bloggography Challenge - Shutter Speed (betterinbulk.net)
- George and Rhowan (chromasia.com)
- The groyne #1 (chromasia.com)
- St. Annes sunset #2 (chromasia.com)
- pipeline (chromasia.com)
- the state of the union #2 (chromasia.com)
- 133 Photos Lit By a Single Candle [Photography] (gizmodo.com)
- Technical Photography Write-Up: Three Arrangements, Three Lights, No Kids (phatbabyphotography.com)
What is ISO?
This is one of the basics of photography. Before the complex matters come, we deal with the basics.
Read on...
-----
What Exactly Does ISO Mean?
By Can San
The ISO rating was originally a measure of film sensitivity. Films are rated for a certain ISO, this defines the sensitivity of the film to light. A film with a lower ISO number needs more light to make the same image than a film with a higher ISO number.
What does ISO mean in the digital world?
A digital sensor receives light and converts this to colour information for its pixels. It performs best when it receives a certain amount of light, let us call this the base ISO of the camera, for example ISO 100.
The same digital sensor can also work if it receives half the light. So if it operates at ISO 200, the camera will let the sensor have half the light, you can still take pictures, but the colour information coming from the sensor will not be as good. Theoretically there is no limit to how high you can take the ISO on a camera up to, the sensor will still give out image information. However, there are practical limits.
If you let a sensor give out information with less and less light, you are bound to have lower and lower image quality. What a manufacturer then does is to define the lowest acceptable image quality for the camera in question, and then cap the ISO setting at the matching level.
When the ISO is increased, you can take pictures with less light. But your pictures will not look as good as the pictures taken at low ISO's.
If you are shooting in low light at ISO 100, the shutter speed will usually be so low that it is not possible to get a handheld sharp picture. If on the other hand, if you increase the ISO to 800 or 1600, the resulting image quality will be lower, but you will be able to take a sharp handheld picture.
The ISO setting allows you to trade image quality for low light ability.
Visit http://www.notesonphotography.com for more articles like this one.
Article Directory: EzineArticles
Lifted from Ezine article directory, with the same title:
What Exactly Does ISO Mean?
-----
Related articles by Zemanta
- Jason #2 (chromasia.com)
- as the light falls (chromasia.com)
- putting out the light #2 (chromasia.com)
- body art #2 (chromasia.com)
- Quantum Dot Camera Phones (technologyreview.com)
- lighting diary #4 (chromasia.com)
- Exposure Triangle - a Bloggography Tutorial (betterinbulk.net)
- St. Annes sunset #2 (chromasia.com)
- Make a DIY Ring Light for Better Macro Shots [DIY] (lifehacker.com)
Wednesday, April 28, 2010
Basic Photography Terms You Should Know
Image via Wikipedia
If there are 3 pillars in photography that you should know, then there are basic photography terms that you should know as well.Here, the author cites the number as 10, so there are 10 photography terms that you should know, to help you in your SLR photography journey.
Here goes:
10 Photography Terms You Should Know
Terminology is key to any form of photography. Know your terms and what you can do with those functions or features and your photographic world opens up to you. Terms are easy to learn. What is a challenge is to make use of what these terms describe.
Getting to grips with your terminology really frees you up to grow on your photographic journey. It may not seem necessary but join a group of avid photographers and you will soon realise your lack. So let's have a look at my top 10 terms you should know.
1. Aperture
Aperture is the size of the lens opening that determines how much light reaches the digital sensor or film in an SLR camera. It is measured in f-stops ranging from f1.2 to f32.
2. Shutter speed
How fast the shutter opens. It also determines for how long the sensor or film is exposed to the light.
3. ISO
This is the sensitivity to light of a digital sensor or the film in an SLR camera. The higher the ISO, the higher digital noise in a digital image or the grain in a film image.
4. Exposure compensation
When a camera light meter sets the exposure on a camera, it is sometimes not 100% correct. It either overexposes or underexposures. In order to correct this there is a setting called exposure compensation which allows you to change the exposure by stops of a third to half to a full stop.
5. Depth of field
This is the depth of focus of an image. When you look at an image and see the area that is in focus in front of and behind the subject it's called the depth of field. How much of it that is in focus is called either a narrow or wide depth of field. This is controlled by the size of the aperture setting. A small aperture gives a wide depth of field while a large aperture gives a narrow depth of field.
6. F-stops
These are the individual aperture sizes that help control the depth of field and regulate the amount of light that is allowed to reach the sensor or film.
7. Fill in flash
This is a very useful way of filling areas of shadow with flash especially outdoors in the full sunshine when shadows fall across a person's face.
8. Aperture priotity
When set to this setting the camera allows you to choose the aperture while it automatically chooses the correct shutter speed.
9. Shutter priority
This is opposite to the aperture priority. The camera chooses the aperture while allowing you to choose the shutter speed.
10. Rule of thirds
This is one of the basic rules of composition. Imagine a tic-tac-toe or noughts and crosses grid superimposed over the image. Where these lines intersect is where you place your focal point or subject creating a wonderfully balanced image.
Learn these ten terms and the principles, functions or settings they represent and you will dramatically improve your photography.
Do you want to learn more about photography in a digital world? I've just completed a brand new e-course delivered by e-mail. Download it here for free by clicking here: http://www.21steps2perfectphotos.com/. To learn how you can take your photography from ordinary to outstanding click here - http://www.21steps2perfectphotos.com/21steps.htm.
Wayne Turner has been teaching photography for 25 years and has written three books on photography.
Article Directory: EzineArticles
Taken from Ezine article directory:
10 Photography Terms You Should Know
-----
Related articles by Zemanta
- Understanding photography - Part 1 (slideshare.net)
- Indoor Sports Photography (mattmcguire.com)
- Exposure Compensation - A Bloggography Tutorial (betterinbulk.net)
- Exposure Triangle - a Bloggography Tutorial (betterinbulk.net)
- Aperture Explained - a Bloggography Tutorial (betterinbulk.net)
- Shooting film (crookedtimber.org)
- How to use depth of field to take better photos (macworld.com)
- Matador U launches photography course (gadling.com)
Tuesday, April 27, 2010
Really Basics of DSLR Photography
Image via Wikipedia
If you are a beginner in DSLR Photography, you'll have the dilemma of having a good piece of equipment, and not knowing how to use it. Much less, to play with it!Not to fret; all hope is not lost.
You already have your camera. The other thing you need is a picture viewer/editor, one that has the function or capability to show the camera settings when the picture was taken. Good candidate: Picasa. Hey, this one is free; just search and download from the web.
OK, so where do we go from here?
Since we are beginners, let us crank that dial on the camera, and use and try and use and try those automatic modes. Let the camera teach you. Let the camera's computer technology guide you.
- Set the dial to each automatic mode and take pictures.
- Upload the pictures to your computer.
- View each picture, and study the values that the camera set for each auto mode.
- ISO
- Aperture
- Shutter Speed
- etc.
Study how the 3 settings are used, and when. Basically, analog or digital, SLRs are making use of these 3 settings the most - they are the pillars of creative photography.
Having said that, here's now what I learned:
- To control or capture motion, shutter speed priority is the main setting.
- To control or define depth of field, aperture priority is the main setting
Enjoy afterward!
Related articles by Zemanta
- The Mode Dial: Get to Know Your Camera With Bloggography (betterinbulk.net)
- Ten Tips on How to Choose Your First DSLR Camera (teabreak.pk)
- Understanding photography - Part 1 (slideshare.net)
- Shutter Speed - A Bloggography Tutorial (betterinbulk.net)
- How to take better pictures (mattmcguire.com)
Subscribe to:
Posts (Atom)